Black and White Filter
Turn a color photo into a high-contrast black and white image with real tonal depth.
What the Black & White Photo Generator does
A basic desaturation slider just strips the color out and leaves you with a flat gray photo. This tool does something closer to what a photographer does in the darkroom: it rebuilds contrast, deepens shadows, and keeps highlights readable so the black and white version has actual depth instead of looking washed out. It works on portraits, landscapes, street photos, or anything with enough tonal variation to hold up once color is gone. It's an AI edit rather than a pixel filter, so the photo is redrawn in monochrome: compare the result with your original, especially faces.
See a sample result
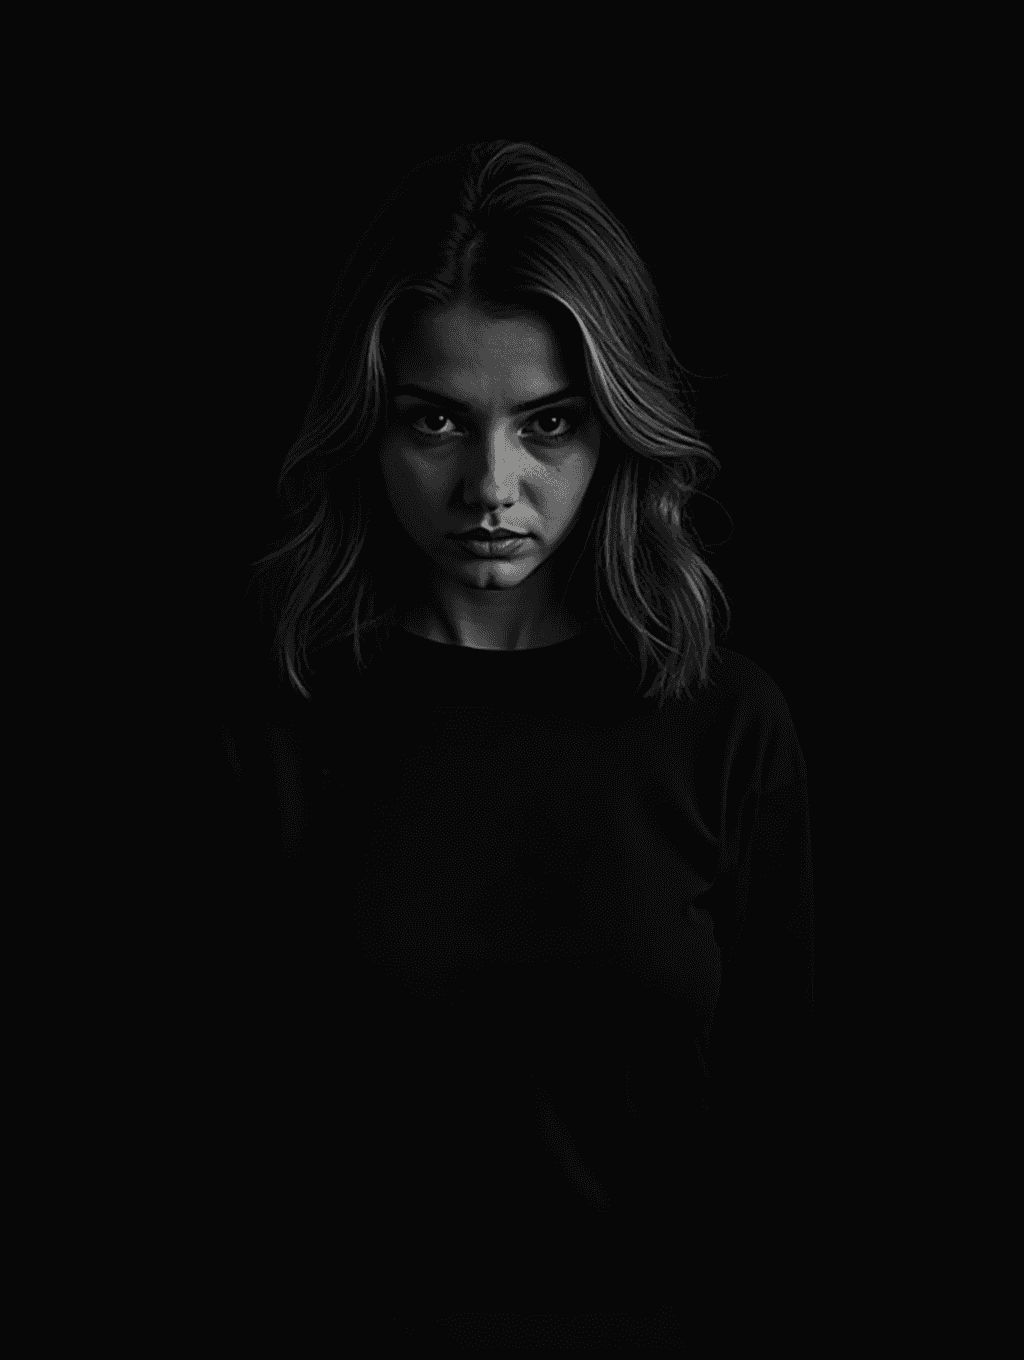
Input: A color portrait of a young woman with shoulder-length wavy hair in a black sweater, standing in front of a dark wall in a dim room, with a lamp lighting her face from above. The result looks similar to the image at the top of this page.
Style applied: High-contrast monochrome portrait
The conversion leans into the drama already present in the lighting, pushing the background to a near-total black while keeping the lit side of the face bright enough to hold detail in the eyes and cheekbone. The hair falls into a range of mid-grays that separate it clearly from both the black background and the highlighted skin, so the image doesn't collapse into two flat tones.
What changed
- Shadows deepened toward true black without losing the outline of the hair and shoulder
- Skin tones converted to a mid-to-light gray range that preserves texture instead of blowing out
- Contrast increased between the lit and shadowed sides of the face for a more sculpted look
- Grain-like texture added subtly, which reads as a classic film aesthetic rather than a digital flatness
Worth checking: the model also darkened the room far more than the original and slightly changed the expression, a typical side effect of the default 'dramatic lighting' instruction. If you want a faithful conversion, edit the instruction to 'keep the lighting and face exactly as they are'.
How it works
- 1
Upload the photo you want converted
Photos with a clear range of light and dark areas, like a portrait with directional lighting or a scene with visible shadows, tend to convert with the most depth.
- 2
The AI rebuilds tonal contrast
Rather than just removing color, the image model redraws the photo in grayscale so skin, sky, and shadow areas each land at a distinct shade instead of blending together. By default it also pushes the lighting toward drama.
- 3
Highlights and shadows are balanced
The result aims for readable detail in both bright and dark areas, avoiding the blown-out highlights or muddy blacks that a simple filter often produces.
- 4
Compare the result against your color original
Look at both versions side by side to judge whether the monochrome conversion actually improves the photo or just changes it.
Use cases
Creating a portfolio-style portrait
Convert a portrait with strong lighting into a moodier, editorial-looking black and white version for a portfolio or profile photo.
Giving old photos a consistent look
Convert a mix of color photos to black and white so a series or album reads as one cohesive set instead of a mismatched batch.
Removing distracting color from a busy scene
Strip out clashing colors in a background or outfit so the viewer's eye goes to composition, expression, or light instead.
Testing whether a photo works better without color
Some photos with weak or muddy color actually read stronger once color is removed. Try the conversion before deciding a photo isn't worth keeping.
Tips for better results
- Start with a photo that has clear contrast, like visible shadows or a bright and dark side, rather than flat, even lighting.
- Portraits with directional light convert with more depth than photos lit straight-on.
- Avoid photos where the main subject is only distinguishable by color, like a red object on a similarly toned background.
- Higher resolution source photos hold up better once contrast and grain are added.
- Edit the instruction to control the mood, for example 'soft, low-contrast, keep the original lighting' instead of the dramatic default.
Frequently asked questions
Is this just a grayscale filter?
No. A grayscale filter removes color and keeps every pixel in place. This tool uses a generative image model, so it redraws the photo with more contrast and mood, and small details like a face or text can change. For an exact, pixel-faithful conversion, a regular photo editor is the better choice.
Will it work on any type of photo?
It works on most photos, but ones with clear lighting contrast, like a portrait with shadows or a landscape with visible light direction, tend to convert with more impact than flat, evenly lit shots.
Can I get the color version back afterward?
Your uploaded photo isn't modified; the tool returns a separate black and white image, so keep your color original and you'll have both versions.
Does it add film grain automatically?
It can add a subtle texture that reads as a classic film look, since a slightly textured black and white image often looks more intentional than a perfectly smooth digital conversion.
Why does my photo look flat after conversion?
Photos with very even, low-contrast lighting to start with have less tonal range to work with, so the black and white version can look flatter than a shot with stronger light and shadow.
Can I use this for professional or print work?
It's built for quick previews and casual use rather than professional print production, where a photographer would typically do manual tonal adjustments in dedicated editing software.
Plans start at $9 a month. See pricing