AI Photo Enhancer
Bring out detail and correct color in a photo that looks soft, dim, or washed out.
What the Photo Enhancer does
Blurry, dim, or grainy photos are what this tool is built to fix. Upload a picture that lost sharpness from a shaky hand, low light, or a low-resolution camera, and the enhancer sharpens fine detail, reduces noise, and corrects exposure and color balance so the photo looks clearer without looking artificially processed. It works well on scanned prints, phone photos taken in dim rooms, and older digital photos that were never very high resolution to begin with. Rather than applying a single filter, it reads what's actually wrong with the image, softness, graininess, dullness, and adjusts each of those separately, aiming for a result that looks like a better original, not an edited one.
See a sample result
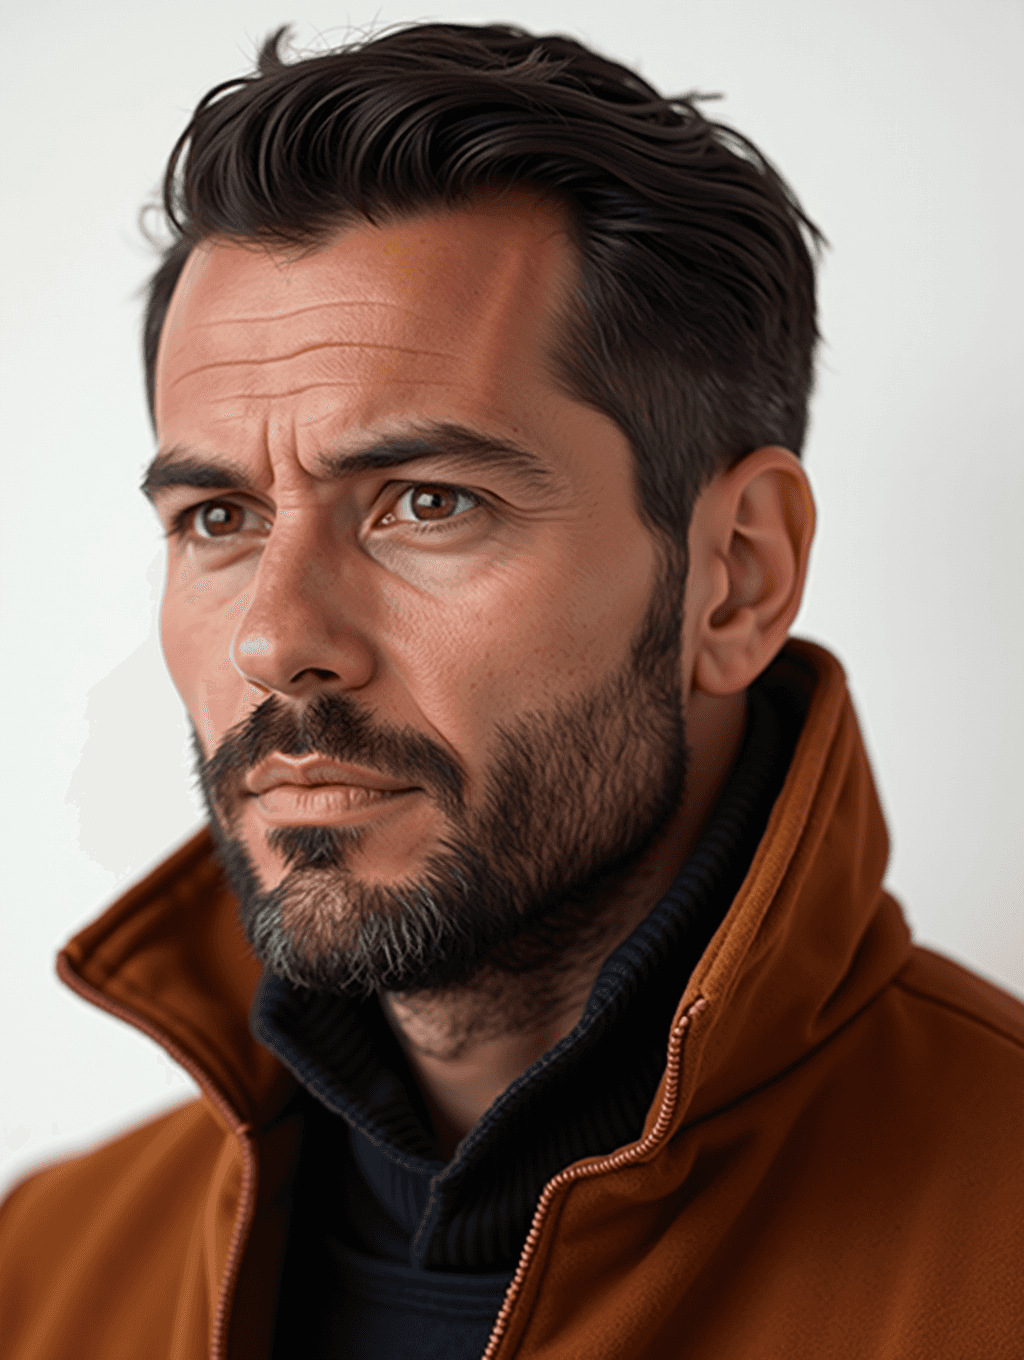
Input: A grainy, slightly soft indoor portrait of a bearded man in a rust-brown jacket, shot under yellow lamp light with visible noise in the darker corners. The enhanced version looks similar to the image at the top of this page.
Detail recovery
The beard, eyebrows and jacket fabric that were soft from slight motion blur are noticeably sharper, and the grainy speckling in the darker background is smoothed out without losing the texture of the room.
Color correction
The yellow cast from the indoor lamp light is pulled back toward a neutral white balance, so skin tones look accurate instead of jaundiced, and the warm tint no longer dominates the whole frame.
Final result
Exposure is lifted slightly in the shadowed corners so the side of the face turned away from the lamp is no longer lost in darkness, while the brighter areas stay controlled rather than blown out. The photo reads as a cleaner version of the same moment, not a different picture.
How it works
- 1
Upload the photo that needs a boost
Grainy phone shots, scanned prints, and slightly blurry photos all work. The enhancer has more to recover from a photo that's soft or noisy than from one that's already sharp.
- 2
The AI checks sharpness, noise, and exposure
It looks at how much detail is missing, how much grain or compression noise is present, and whether the exposure and color are off, then builds a plan specific to that photo.
- 3
Detail gets sharpened and noise gets cleaned up
Edges and fine texture are brought back where possible, and speckled grain or blocky compression artifacts are smoothed without turning the photo waxy or plastic-looking.
- 4
Color and exposure are balanced last
Once detail and noise are handled, exposure and color get a final pass so the finished photo looks natural rather than oversharpened or overly bright.
Use cases
Rescuing an old scanned photo
Scanned prints often pick up grain, faded color, and softness from the scanning process itself. The enhancer can pull back detail and correct the color cast that scanning adds.
Cleaning up a low-light phone photo
Indoor shots under dim or yellow lighting tend to come out grainy and color-shifted. Running one through the enhancer corrects the color and quiets the noise.
Preparing a photo for printing
Print exposes softness and noise that look fine on a small screen. Enhancing a photo first helps it hold up at a larger printed size.
Improving a photo before sharing it
A sharper, better-balanced photo tends to look more presentable when it's going into a shared album, a social post, or a print for someone else to see.
Tips for better results
- Upload the largest version of the file you have, since the enhancer works from the detail that's actually present in the image.
- Very dark or very blurry photos will show a bigger visible change than a photo that only needed a small color correction.
- If a scanned photo looks yellow or faded, expect the enhancer to spend more effort correcting color than sharpening detail.
- Check the enhanced photo at full resolution rather than a small preview, since noise reduction and sharpening are easiest to judge up close.
- Group photos with people in both bright and shadowed areas benefit most from the exposure balancing step.
Limitations
The enhanced photo is generated by an AI model, which means it can fill in plausible detail that the camera never actually captured, such as individual hairs, skin texture, or lettering. That usually looks good, but it isn't a faithful record, so don't rely on an enhanced image as evidence or for anything that depends on exact detail, and check faces and text closely. A severely blurry or tiny photo will improve, but the model may guess wrong about what was there.
Frequently asked questions
Does the enhancer add detail that wasn't in the original photo?
Sometimes, yes. It's a generative model, so on a soft or small photo it can reconstruct fine texture like hair, fabric, or skin that looks right but wasn't truly captured. Check faces and any text in the result against the original.
Will this fix a very blurry photo completely?
It will improve sharpness and clarity noticeably, but a photo with heavy motion blur or very low resolution has a limit to how much detail can be recovered.
Can I enhance old scanned family photos?
Yes, scanned photos often have grain, faded color, and softness from the scanning process, and the enhancer addresses all three in one pass.
What causes a photo to need enhancing in the first place?
Low light, a shaky hand, an older or lower-resolution camera, and heavy compression from messaging apps are the most common reasons a photo looks soft or grainy.
Is this the same as an image editor?
It's more focused: the enhancer specifically targets sharpness, noise, exposure, and color balance, rather than broader creative edits like background changes or style transformations.
Plans start at $9 a month. See pricing