Street Style Aesthetic Photo Generator
Turn a photo into an urban, fashion-blog style street photo.
What the Street Style Photo Generator does
Street style photography has a specific formula: a confident stance, a city block as the backdrop, an outfit that's clearly the point of the shot. Getting that look usually means a photographer, a good block, and decent light lining up at the same time. This tool skips that by building the look around a photo you already have. Describe the outfit, the city mood, or a specific accessory in the instruction box, upload your photo, and get back an image styled like it was shot for a street style blog: cobblestones or city architecture behind you, a pose that reads editorial rather than candid, and an outfit treated like it's meant to be photographed.
See a sample result
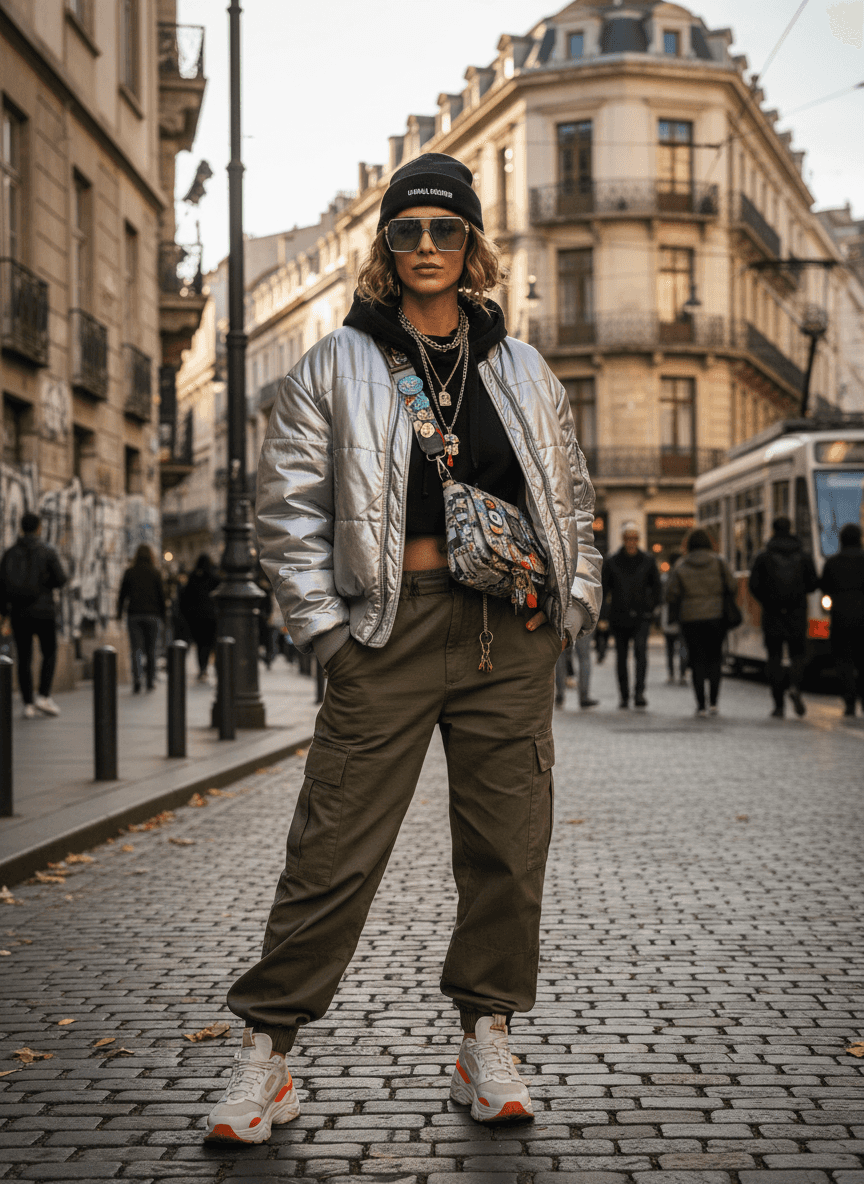
Input: A simple, plainly lit photo of someone standing against a blank wall in casual clothes: jeans and a plain top, arms relaxed, no outdoor setting or styled accessories visible. The result looks similar to the image at the top of this page.
What changed
The plain wall is replaced with a European city street: ornate stone buildings, wrought-iron balconies, and a tram passing in the background, with pedestrians blurred to keep focus on the subject. The pose shifts to a wide, confident stance, one hand in a pocket, chin level, the kind of stance street style photographers ask for.
Style notes
- The outfit becomes a layered streetwear look: a metallic puffer jacket over a black hoodie, a beanie, oversized sunglasses, layered necklaces, and a crossbody bag covered in pins
- Cargo pants and chunky sneakers complete the look, in colors that contrast against the warm stone backdrop
- Lighting reads as soft late-afternoon daylight, even across the face and outfit, the way street style photographers like it
How it works
- 1
Upload a full-body or waist-up photo
A photo where your outfit is visible, not just your face, gives the AI the most to work with. Standing poses work better than seated ones.
- 2
Describe the outfit and setting
Name specifics: 'silver puffer jacket, cargo pants, sunglasses' or 'leather jacket on a European cobblestone street.' The instruction box controls the wardrobe and location.
- 3
The AI builds the street scene
It adds an urban backdrop, adjusts the pose toward a confident street-style stance, and applies the outfit and accessories you described.
- 4
Check the details before sharing
Look closely at layered accessories, bag details, and any text on clothing or signage. Generative edits can blur or misplace small elements like these.
Use cases
Fashion or style social accounts
Build an editorial-looking street photo for an outfit post without arranging a real photo shoot on location.
Previewing an outfit before buying it
Describe a piece you're considering in the instruction box to see roughly how it might read in a styled photo before you commit to it.
Portfolio or lookbook mockups
Generate a set of street style images with different outfits or city moods to pull together a quick lookbook concept.
Testing a new personal style
Try a style you haven't worn before, like harajuku or old money, and see how it reads on you before shopping for it.
Tips for better results
- Use a full-body or waist-up photo so the outfit has room to be built around your pose.
- Name specific garments and colors rather than a vague style word; 'olive cargo pants and a silver puffer jacket' works better than 'streetwear.'
- Mention the city or backdrop you want, since it changes the mood: cobblestone Europe reads differently than a modern downtown block.
- If accessories look muddled in the first result, list them individually in the instruction and run it again.
- Check any bag, jacket, or sign text closely afterward for spelling before you share the photo.
Limitations
This is a generative edit, not a real photo shoot or a styling consultation. It can misplace or blur small details like layered jewelry, patches, or background text, so review the result before posting it. Fit and cut are approximated from the instruction rather than measured, and the pose and setting are AI-generated, not a real location.
Frequently asked questions
Can I specify an exact outfit?
Yes, describe the pieces you want in the instruction box, down to colors and specific items like a jacket style or accessory, and the tool builds the look around that description.
Do I need to already be dressed in street style for the source photo?
No, any clear, full-body or waist-up photo works. The tool replaces or restyles the outfit based on what you describe.
Can I choose the city or background?
Yes, name it in the instruction box, such as a European cobblestone street or a modern downtown block, and the setting follows that direction.
Will the outfit look exactly like what I typed?
It aims to match your description closely, but as a generative tool it can interpret details loosely, especially with layered accessories or specific brand logos.
Is this useful for shopping decisions?
It's a rough style preview, not a fit or sizing tool. Treat it as inspiration rather than confirmation that a piece will look a certain way on you in person.
How many outfits can I try?
Each run gives one image and uses credits, so try one outfit per run and describe it clearly the first time. Change the instruction between runs to compare looks.
Plans start at $9 a month. See pricing