AI Image Editor
Turn a flat photo into a polished one without opening a full editing suite.
What the Image Editor does
This image editor takes one photo and reworks the color, lighting, and fine detail in a single pass, aiming for a clean, professional look rather than a heavy filter. Upload a photo from your phone, a product shot, or an old snapshot you want to freshen up, and you get back an edited version with better exposure, richer color, and sharper detail, without touching sliders yourself. It suits anyone who wants a listing photo to look more polished, a personal photo that came out flat or dim to look better, or a photo prepared for a page or profile, without learning a full photo editing program.
See a sample result
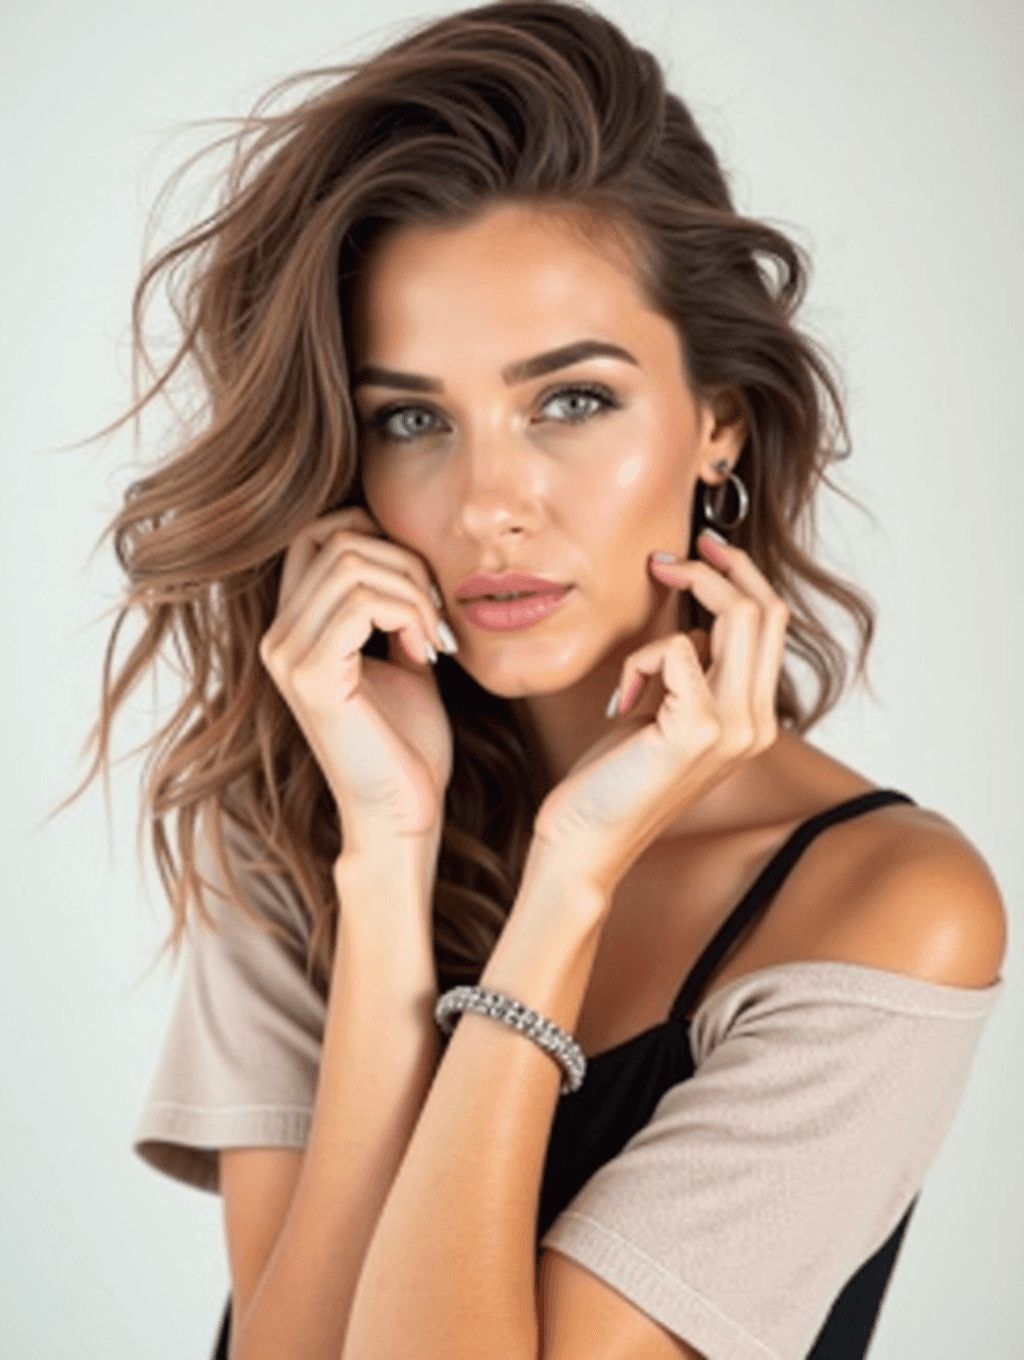
Input: A slightly dim, flat studio portrait of a woman with long wavy brown hair, hands raised to her face, wearing an off-shoulder top and a silver bracelet against a pale background. The polished version is similar to the image at the top of this page.
What changed
The exposure was lifted so the subject's face is no longer sitting in shadow, and the dull gray cast was corrected toward a warmer, more neutral white balance. Skin tones read healthier, the eyes pick up more color, and the pale background now reads clean white instead of muddy gray.
Detail and clarity
Fine detail in the hair, the bracelet and the fabric texture was sharpened slightly, and the soft haze from the flat lighting was reduced so edges look more defined. Contrast was increased just enough to give the image depth without crushing the shadows in the hair or blowing out the background.
Result
The photo now looks like it was captured in better light: still natural, but with the flatness gone and color that holds up when shared or printed.
How it works
- 1
Upload the photo you want edited
Any photo works, a portrait, a landscape, a product shot, or a screenshot of a scanned print. The clearer the original file, the more detail the editor has to work with.
- 2
The AI reads exposure, color, and detail
It looks at how bright, dim, flat, or off-color the photo is, then plans a set of adjustments: exposure correction, color grading, sharpening, and cleanup, tailored to that specific photo.
- 3
Adjustments are applied in one pass
Instead of a single filter laid on top, the edit touches lighting, color balance, and clarity together, aiming for a result that looks like a better photo, not a processed one.
- 4
You get back a ready-to-use image
Download the edited photo and compare it against the original. The editing instruction is plain text you can rewrite, so if you want something specific, like a warmer grade or a cleaner background, change the instruction and run it again.
Use cases
Fixing a photo that came out flat
Overcast days and indoor lighting often leave photos dull. Run one through the editor to bring back contrast and color without redoing the whole shoot.
Prepping a photo for a listing or profile
A cleaner, better-lit photo tends to get more attention on a marketplace listing, a dating profile, or a business page than the original straight-from-camera shot.
Refreshing an older photo
Photos taken on older phones or in bad light can look tired years later. The editor can bring back detail and color without a full manual restoration.
Getting a quick edit without learning software
Not everyone wants to learn layers and curves. This gives a one-step improvement for people who just want the photo to look better, not a design skill to pick up.
Tips for better results
- Start with the highest resolution version of your photo, since upscaling a small file after editing won't recover missing detail.
- If a photo is very dark, expect the biggest visible change in exposure and shadow detail rather than color.
- Run portraits and landscapes from the same shoot separately, since each benefits from slightly different adjustments.
- Compare the edited version at full size, not as a thumbnail, since sharpening and color changes are easiest to judge up close.
- If the first pass overshoots color or contrast for your taste, try the edit again on the original file rather than editing an already-edited copy.
Limitations
Results depend heavily on the quality of the photo you start with. Very blurry, heavily compressed, or extremely underexposed images will show less improvement than a photo that's simply flat or dull. By default the editor makes broad adjustments to color, light, and detail. Because the result is generated by an AI model, fine details such as text, jewelry, or facial features can change slightly, so check the edit closely. For specific fixes like removing an object or swapping a background, a dedicated tool built for that job usually gives a cleaner result.
Frequently asked questions
Will the image editor change the composition of my photo?
It isn't asked to. The default instruction targets exposure, color, and detail, and the framing usually stays the same. The edit is generated by an AI model, though, so small details can shift; compare the result to your original before you use it.
Can I use this on product photos?
Yes, product photos often benefit the most, since better exposure and color accuracy can make a listing photo look noticeably more professional.
How is this different from a filter?
A filter applies one fixed look to every photo. This editor reads the specific photo first and adjusts exposure, color, and sharpness based on what that image actually needs.
What file types can I upload?
Standard photo formats like JPG and PNG work well. For best results, upload the original file rather than a screenshot or a copy that's already been compressed multiple times.
Can I edit the same photo more than once?
Yes, though it's best to start from the original file each time rather than repeatedly editing an already-edited version, which can overcorrect color and detail.
Plans start at $9 a month. See pricing